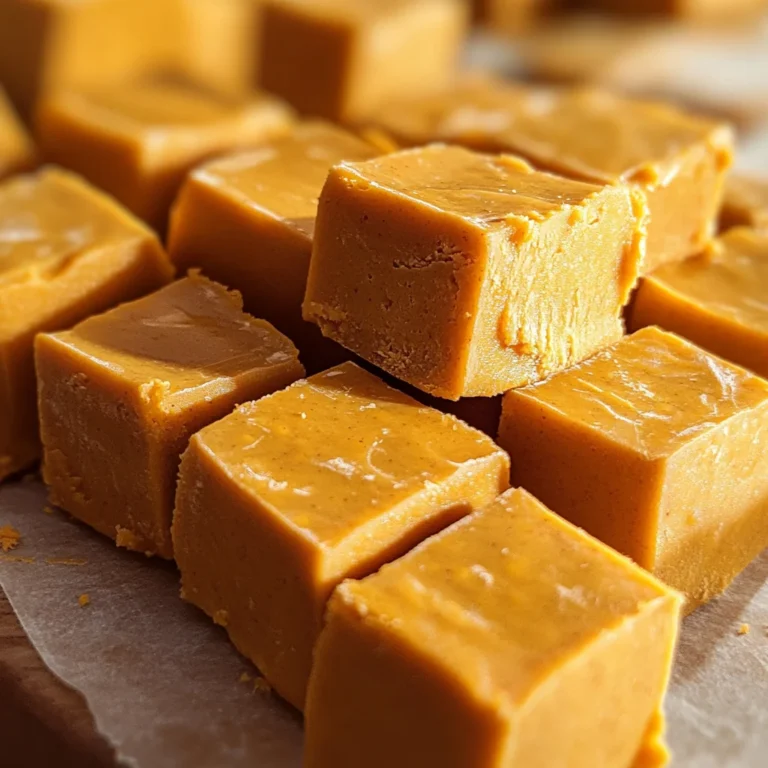
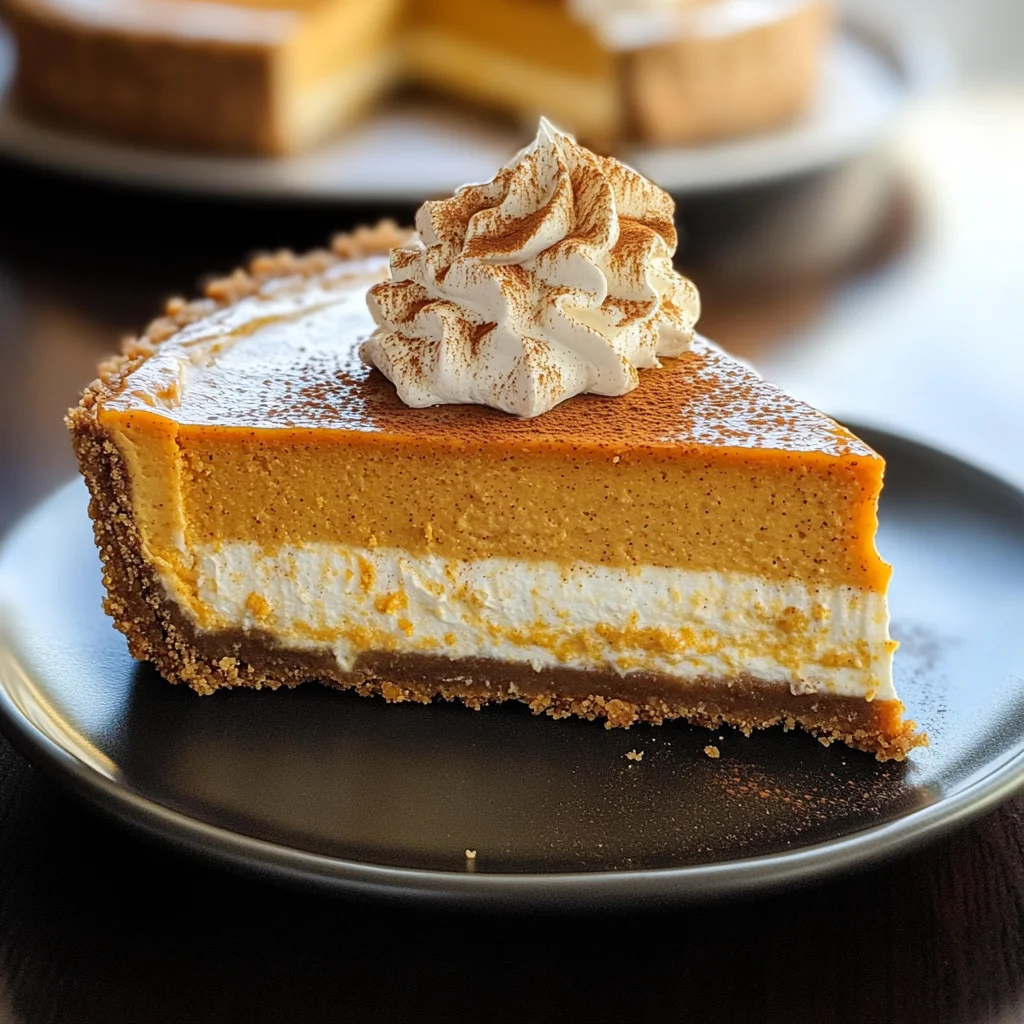
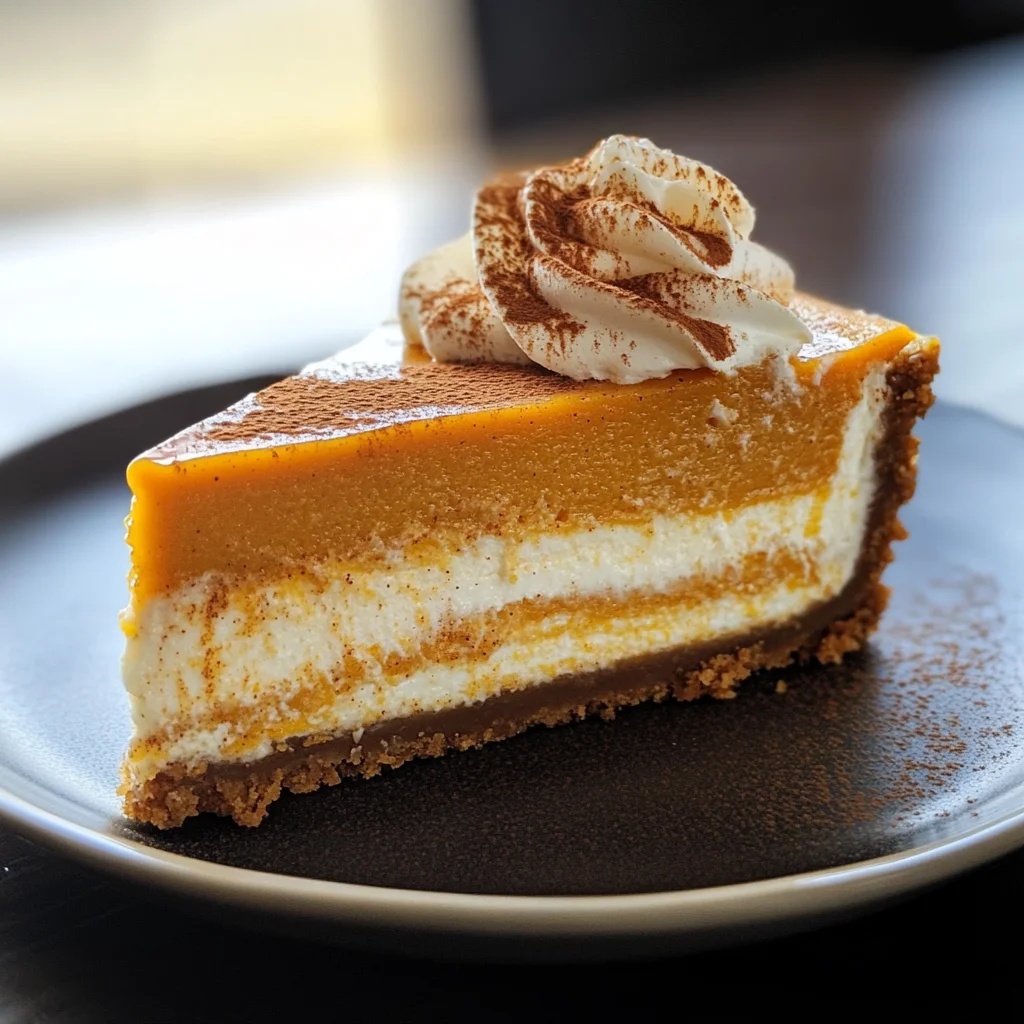
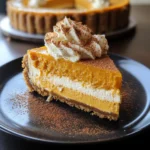
Pumpkin Cheesecake (no water bath)
Elevate your Thanksgiving meal with a delightful dessert that combines the rich flavors of pumpkin pie and the creamy texture of cheesecake. This Pumpkin Cheesecake (no water bath) is perfect for any occasion, whether it’s a holiday gathering or a cozy family dinner. With its smooth filling and buttery crust, this cheesecake will surely impress your guests.
Why You’ll Love This Recipe
- Easy Preparation: This recipe skips the water bath, making it simpler and less messy to prepare.
- Rich Flavor: The combination of pumpkin and spices creates a warm, comforting flavor that defines fall.
- Versatile Serving Options: Top it with whipped cream, caramel sauce, or seasonal fruits to customize your dessert.
- Impressive Presentation: The classic cheesecake look makes it a stunning centerpiece for any table.
- Make Ahead: Prepare in advance and chill overnight for convenience without sacrificing taste.
Tools and Preparation
Before diving into this delicious recipe, gather your tools to ensure a smooth baking experience.
Essential Tools and Equipment
- 9-inch springform pan
- Mixing bowls
- Stand mixer or hand mixer
- Measuring cups and spoons
- Rubber spatula
- Liquid measuring cup
Importance of Each Tool
- 9-inch springform pan: Allows easy removal of the cheesecake without damaging its shape.
- Stand mixer or hand mixer: Ensures the cream cheese is mixed smoothly, creating a velvety texture in your batter.
- Rubber spatula: Perfect for scraping down the sides of bowls to combine ingredients thoroughly.
Ingredients
To make this delicious Pumpkin Cheesecake (no water bath), you’ll need the following ingredients:
For the Crust
- 1 3/4 cups graham cracker crumbs (see note below on using gingersnaps)
- 5 tablespoons granulated sugar
- 6 tablespoons butter (melted)
For the Filling
- 32 ounces cream cheese (at room temperature; Philadelphia brand preferred)
- 1 1/4 cups granulated sugar
- 2 teaspoons vanilla extract
- 1 cup pure pumpkin (Libby’s brand preferred)
- 1 teaspoon pumpkin pie spice
- 1 teaspoon cinnamon
- 4 large eggs (at room temperature)
Toppings (Optional)
- Any desired cheesecake toppings
How to Make Pumpkin Cheesecake (no water bath)
Step 1: Preheat the Oven
Preheat your oven to 350 degrees Fahrenheit. Make sure you have your oven racks positioned in the center for even baking.
Step 2: Prepare the Crust
In a medium-sized bowl, stir together graham cracker crumbs, sugar, and melted butter until well combined. The mixture should resemble damp sand.
– Using the bottom of a measuring cup, press this mixture firmly into the bottom and halfway up the sides of your prepared 9-inch springform pan.
– Bake in the preheated oven for 7 minutes. Remove from oven and set aside.
Step 3: Mix the Filling
Reduce the oven temperature to 325 degrees Fahrenheit.
– In a large mixing bowl or stand mixer, beat the cream cheese for about 30 seconds until smooth. Scrape down the sides of the bowl.
– Gradually add in granulated sugar and mix until completely smooth.
Step 4: Add Flavorings
Stir in vanilla extract, pure pumpkin, pumpkin pie spice, and cinnamon into the cream cheese mixture.
– Ensure you scrape down the sides again to mix evenly.
Step 5: Incorporate Eggs
Crack four large eggs into a liquid measuring cup. Use a fork to beat them until scrambled.
– With your mixer on low speed, slowly pour in beaten eggs into the cream cheese mixture until just incorporated.
– Remove from mixer and scrape down again to ensure there are no lumps.
Step 6: Pour Batter into Crust
Tap your mixing bowl on the counter for about 30-45 seconds to release air bubbles from your batter.
– Carefully pour filling into the center of your graham cracker crust and gently smooth out the top.
Step 7: Bake Your Cheesecake
Bake in preheated oven at 325 degrees Fahrenheit for 40 minutes. Then reduce temperature to 250 degrees Fahrenheit and bake for an additional 45 minutes.
– After baking time is complete, turn off oven but keep cheesecake inside for another 30 minutes without opening the door.
Step 8: Cooling Process
Crack open the oven door slightly to allow cheesecake to cool gradually for one hour before removing it from heat completely.
– Let it come to room temperature on your counter over about 3-4 hours before covering with plastic wrap and placing in fridge.
Chill completely for at least six hours or overnight before serving. When ready to serve, open springform pan carefully and slice using a hot knife for clean edges!
How to Serve Pumpkin Cheesecake (no water bath)
Serving your Pumpkin Cheesecake is an opportunity to enhance its flavors and presentation. Whether you’re celebrating a special occasion or enjoying a cozy dessert night, these serving suggestions will make your cheesecake even more delightful.
Toppings
- Whipped Cream: A dollop of freshly whipped cream adds lightness and sweetness.
- Caramel Sauce: Drizzle warm caramel sauce on top for a rich, buttery flavor.
- Chopped Nuts: Sprinkle toasted pecans or walnuts for a crunchy texture contrast.
- Chocolate Shavings: Add chocolate shavings for a touch of elegance and extra sweetness.
Garnishes
- Fresh Mint Leaves: A few mint leaves can brighten the plate and add a hint of freshness.
- Cinnamon Dusting: Lightly dust the top with cinnamon for an aromatic finish.
- Pumpkin Seeds: Scatter roasted pumpkin seeds for a seasonal touch.
Serving Style
- Individual Slices: Plate each slice separately with garnishes for a polished presentation.
- Family Style: Serve the entire cheesecake on a cake stand for guests to help themselves.
How to Perfect Pumpkin Cheesecake (no water bath)
To achieve the best results with your Pumpkin Cheesecake, consider these essential tips. They will help you create a creamy texture and rich flavor that everyone will love.
- Bold Ingredients: Use high-quality cream cheese and pure pumpkin puree for the best flavor.
- Room Temperature Eggs: Ensure eggs are at room temperature for smoother mixing and better incorporation into the batter.
- Avoid Overmixing: Mix just until ingredients are combined to prevent incorporating too much air, which can lead to cracks.
- Tap the Bowl: Tap the bowl on the counter before baking to release air bubbles that may affect the texture.
- Cool Gradually: Let the cheesecake cool inside the oven after baking to reduce the risk of cracks from sudden temperature changes.
Best Side Dishes for Pumpkin Cheesecake (no water bath)
Pairing side dishes with your Pumpkin Cheesecake can elevate your dessert experience. Here are some complementary options that work wonderfully alongside this creamy delight.
- Spiced Apple Cider: Warm spiced apple cider brings cozy flavors that match perfectly with pumpkin.
- Gingerbread Cookies: The warmth of gingerbread offers a delightful contrast in texture and flavor.
- Pecan Pie Bars: These bars provide another sweet option with nutty richness that pairs well with cheesecake.
- Fruit Salad: A refreshing fruit salad adds brightness and balances out the richness of the cheesecake.
- Cheeseboard: A selection of cheeses, crackers, and fruits creates an inviting spread alongside dessert.
- Chocolate Mousse: The lightness of chocolate mousse contrasts nicely with dense pumpkin cheesecake while still satisfying sweet cravings.
Common Mistakes to Avoid
Making a Pumpkin Cheesecake (no water bath) can be simple, but there are common pitfalls to watch out for.
- Overmixing the Batter: Mixing too much can incorporate too much air, leading to cracks. Mix until just combined for a smooth texture.
- Using Cold Ingredients: Cold cream cheese and eggs can create lumps. Always use room temperature ingredients for a creamy cheesecake.
- Skipping the Cooling Steps: Rapid cooling can cause cracks. Allow the cheesecake to cool gradually in the oven before refrigerating it.
- Not Tapping the Bowl: Failing to tap the bowl after mixing leaves air bubbles in the batter. Tap it on the counter to release those bubbles before baking.
- Ignoring Baking Time: Overbaking can dry out your cheesecake. Keep an eye on it and follow timing closely for a perfect finish.
Storage & Reheating Instructions
Refrigerator Storage
- Store leftover Pumpkin Cheesecake (no water bath) in an airtight container.
- It will keep well in the fridge for up to 5 days.
Freezing Pumpkin Cheesecake (no water bath)
- Wrap individual slices tightly in plastic wrap and then place them in a freezer-safe container.
- It can be frozen for up to 3 months.
Reheating Pumpkin Cheesecake (no water bath)
- Oven: Preheat to 325°F and warm for about 10-15 minutes until slightly warm.
- Microwave: Heat individual slices on medium power for 20-30 seconds. Check frequently to avoid overheating.
- Stovetop: Place a slice in a pan over low heat, covering with a lid for even warming.
Frequently Asked Questions
Here are some common questions regarding making Pumpkin Cheesecake (no water bath).
Can I use gingersnap crumbs instead of graham crackers?
Yes, gingersnap crumbs add a nice spice that complements the pumpkin flavor beautifully.
How do I know when my Pumpkin Cheesecake (no water bath) is done?
The center should still have a slight jiggle; it will firm up as it cools.
What toppings go well with Pumpkin Cheesecake?
Whipped cream, caramel sauce, or toasted nuts are great choices for added flavor and texture.
Can I make this cheesecake ahead of time?
Absolutely! This cheesecake tastes even better after chilling overnight, making it perfect for preparing in advance.
Final Thoughts
This Pumpkin Cheesecake (no water bath) is not only delicious but also versatile. You can customize it with various toppings or adapt the crust to your liking. It’s a delightful addition to any dessert table, especially during festive seasons. Don’t hesitate to try this recipe and enjoy its creamy goodness!
Pumpkin Cheesecake (no water bath)
Elevate your dessert game this season with a delectable Pumpkin Cheesecake (no water bath). This creamy, spiced delight combines the classic flavors of pumpkin pie and the rich texture of cheesecake, making it an ideal treat for gatherings, holidays, or cozy family dinners. With its buttery graham cracker crust and smooth filling, this dessert not only looks impressive but is also easy to prepare without the hassle of a water bath. Customize it with your favorite toppings or enjoy it plain; either way, it’s sure to be a crowd-pleaser.
- Prep Time: 20 minutes
- Cook Time: 92 minutes
- Total Time: 1 hour 52 minutes
- Yield: Serves approximately 12 slices 1x
- Category: Dessert
- Method: Baking
- Cuisine: American
Ingredients
- 1 3/4 cups graham cracker crumbs
- 5 tablespoons granulated sugar
- 6 tablespoons melted butter
- 32 ounces cream cheese
- 1 1/4 cups granulated sugar
- 2 teaspoons vanilla extract
- 1 cup pure pumpkin
- 1 teaspoon pumpkin pie spice
- 1 teaspoon cinnamon
- 4 large eggs
Instructions
- Preheat oven to 350°F. Prepare a 9-inch springform pan.
- Mix graham cracker crumbs, sugar, and melted butter in a bowl. Press into the bottom and halfway up the sides of the pan. Bake for 7 minutes.
- Reduce oven temperature to 325°F. Beat cream cheese until smooth, then gradually add sugar.
- Mix in vanilla extract, pumpkin puree, pumpkin pie spice, and cinnamon.
- Beat eggs separately and incorporate them slowly into the mixture until just combined.
- Pour the filling into the crust and bake for 40 minutes at 325°F, then lower to 250°F and bake for an additional 45 minutes.
- Turn off oven and let cheesecake cool inside for another hour before room temperature cooling for about 3-4 hours.
- Chill overnight before serving.
Nutrition
- Serving Size: 1 slice (approximately 120g)
- Calories: 360
- Sugar: 25g
- Sodium: 290mg
- Fat: 25g
- Saturated Fat: 15g
- Unsaturated Fat: 8g
- Trans Fat: 0g
- Carbohydrates: 31g
- Fiber: 1g
- Protein: 6g
- Cholesterol: 97mg